
One of the most frustrating things to do is shuffle various USB drives trying to remember which one you were using last (for persistent OS boots), or which one has the working version of “X” operating system/which installer. This article covers how to take an external USB drive (whether a large thumb drive or an actual external hard drive) and turn it into a whizbang multi-OS booting device.
NOTE: For this tutorial I am using a 32 GB flash drive which was previously named “XFER”. You will need to adjust for your device settings.
-
- Download Easy2Boot (note: this link is to the DPMS version that lets you install Windows XP to modern SATA/RAID/SCSI systems) (or use this StackAttack mirror)
- Download RPMPrepUSB (or use this StackAttack mirror)
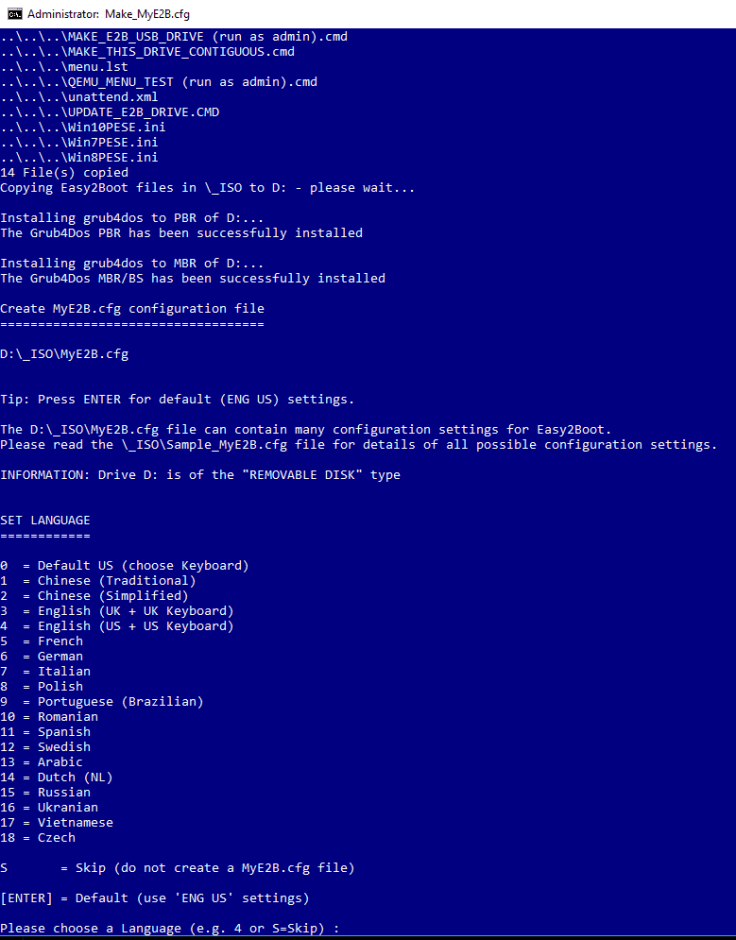
- Run the Easy2Boot installer. When the below screen launches select the “Make_E2B_USB_Drive.cmd” button.
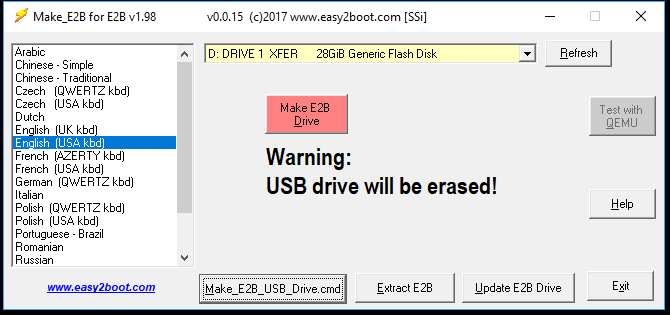
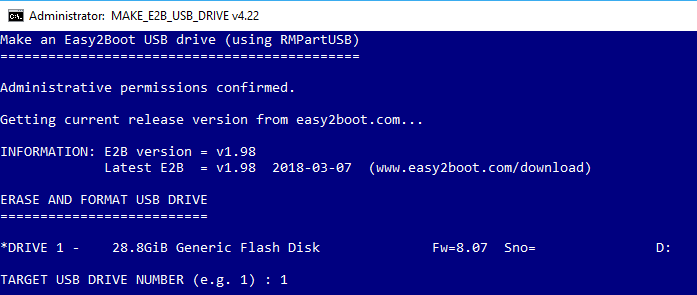
- In the command window select your drive by entering the number and pressing Enter:
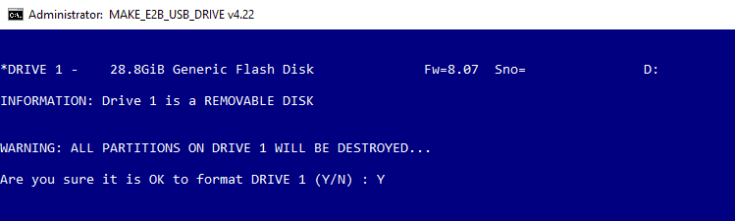
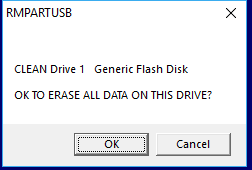
- Confirm that the drive will be wiped by entering “Y” and then pressing Enter:
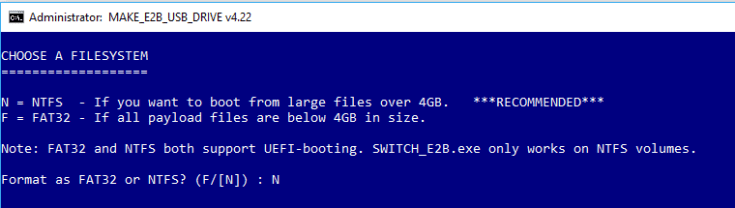
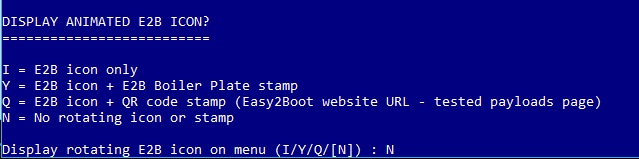
- Select NTFS as the format of the device by entering “N” and then pressing Enter.
(NOTE: I prefer to use NTFS to avoid issues with the size of the ISOs. This does not impact the operating systems that run afterwards as this is just the storage for the bootloader.)
- Confirm the wipe one more time:
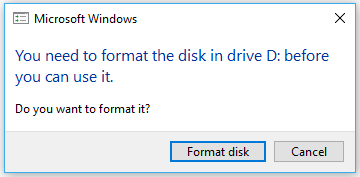
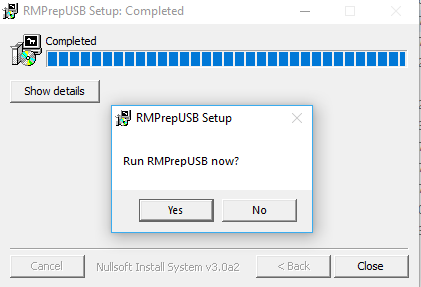
- You may be prompted by Windows to format the drive. If so, just select “Cancel” because the formatting is taking place behind the scenes.
- Wait for the formatting and file copying to complete, then select the language to use:
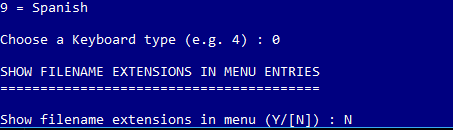
- Do the same for the keyboard settings.
- Choose whether or not to show filename extensions (NOTE: I choose no for this as it doesn’t matter to me and the presentation looks better without them, but it’s really personal choice).
- Choose whether or not to show the branding (NOTE: Again, I choose not to).
- Confirm writing the file to the drive by entering “Y” and pressing Enter:

- And finally, choose whether or not to keep a “safety buffer” file.NOTE: I normally leave this because 1) the default 800 MB works well, 2) it’s not a significant hit to the size of drives I use, and 3) it helps avoid other issues if I forget to make my ISOs contiguous.
Once the background turns green you’ve finished the drive creation ; now on to loading up ISOs!

- Load your ISO files as appropriate. For quick reference, place them as follows:
* \_ISO\LINUX for Linux ISOs
* \_ISO\WINDOWS\{name} for Windows ISOs
(etc)

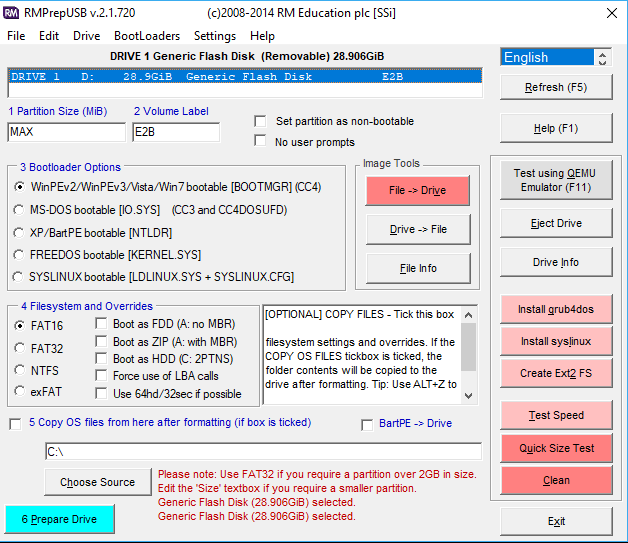
- Extract the “Install_RMPrepUSB_Full.exe” file from the downloaded ZIP file and run it. Select all options and the path where you would like it to go (or just accept defaults) and then when prompted run the program:
- The user interface can be confusing…
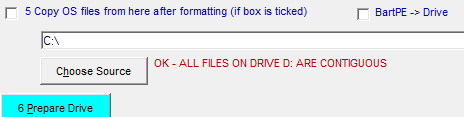
- But we only care about one function, which makes all of the files contiguous. Either select it from the menu as shown below or press CTRL+F2.

- The status (confusingly) updates on the bottom center with the red text. Once the work has completed you will see the following:
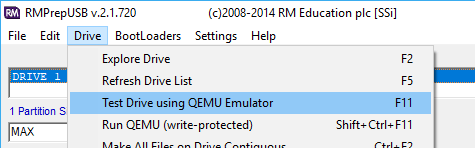
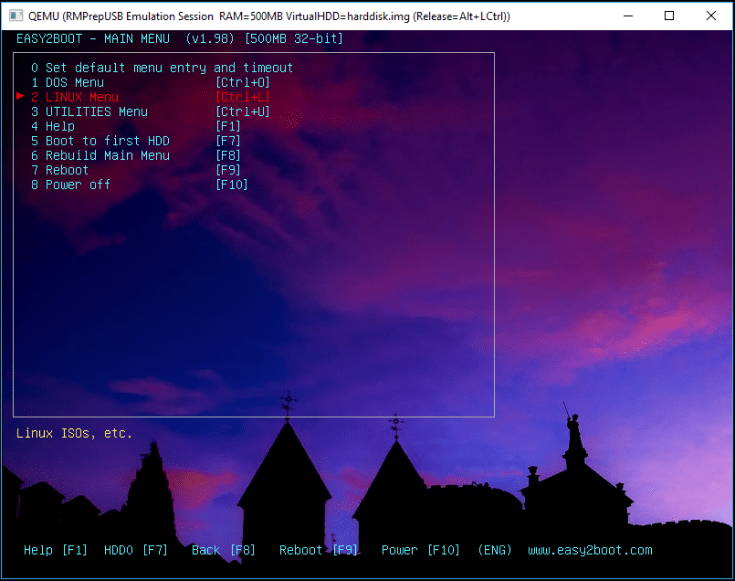
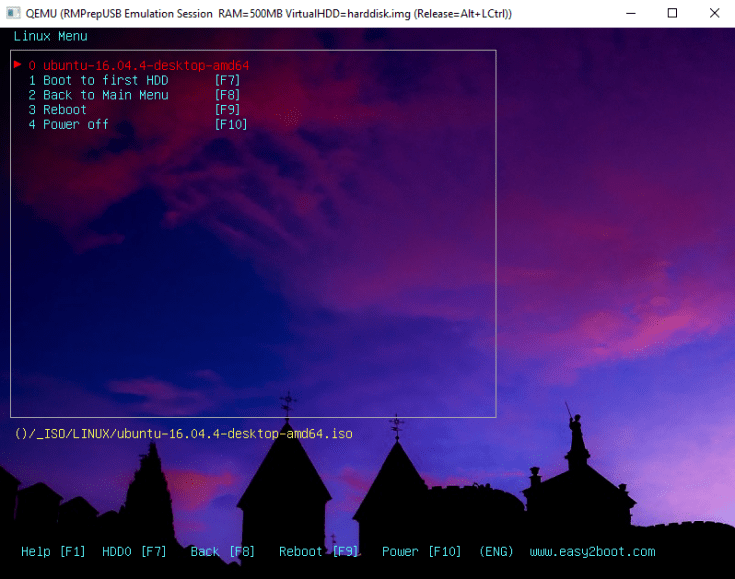
- If you want to test the drive without actually rebooting into it you can do so from the RPMPrepUSB directly using the “Test Drive using QEMU Emulator” option or by pressing F11.
- That’s it! Boot and enjoy. 🙂


Leave a comment